如果你厌倦了每次配置新服务器都要重复搜索“如何安装 Docker”、“如何开启 BBR”或“如何申请 SSL 证书”,那么 VPS Toolbox 就是为你量身定制的。
它不是一个单一的功能脚本,而是一个交互式运维终端。只需通过简单的数字选择,就能完成 80% 的日常运维任务。
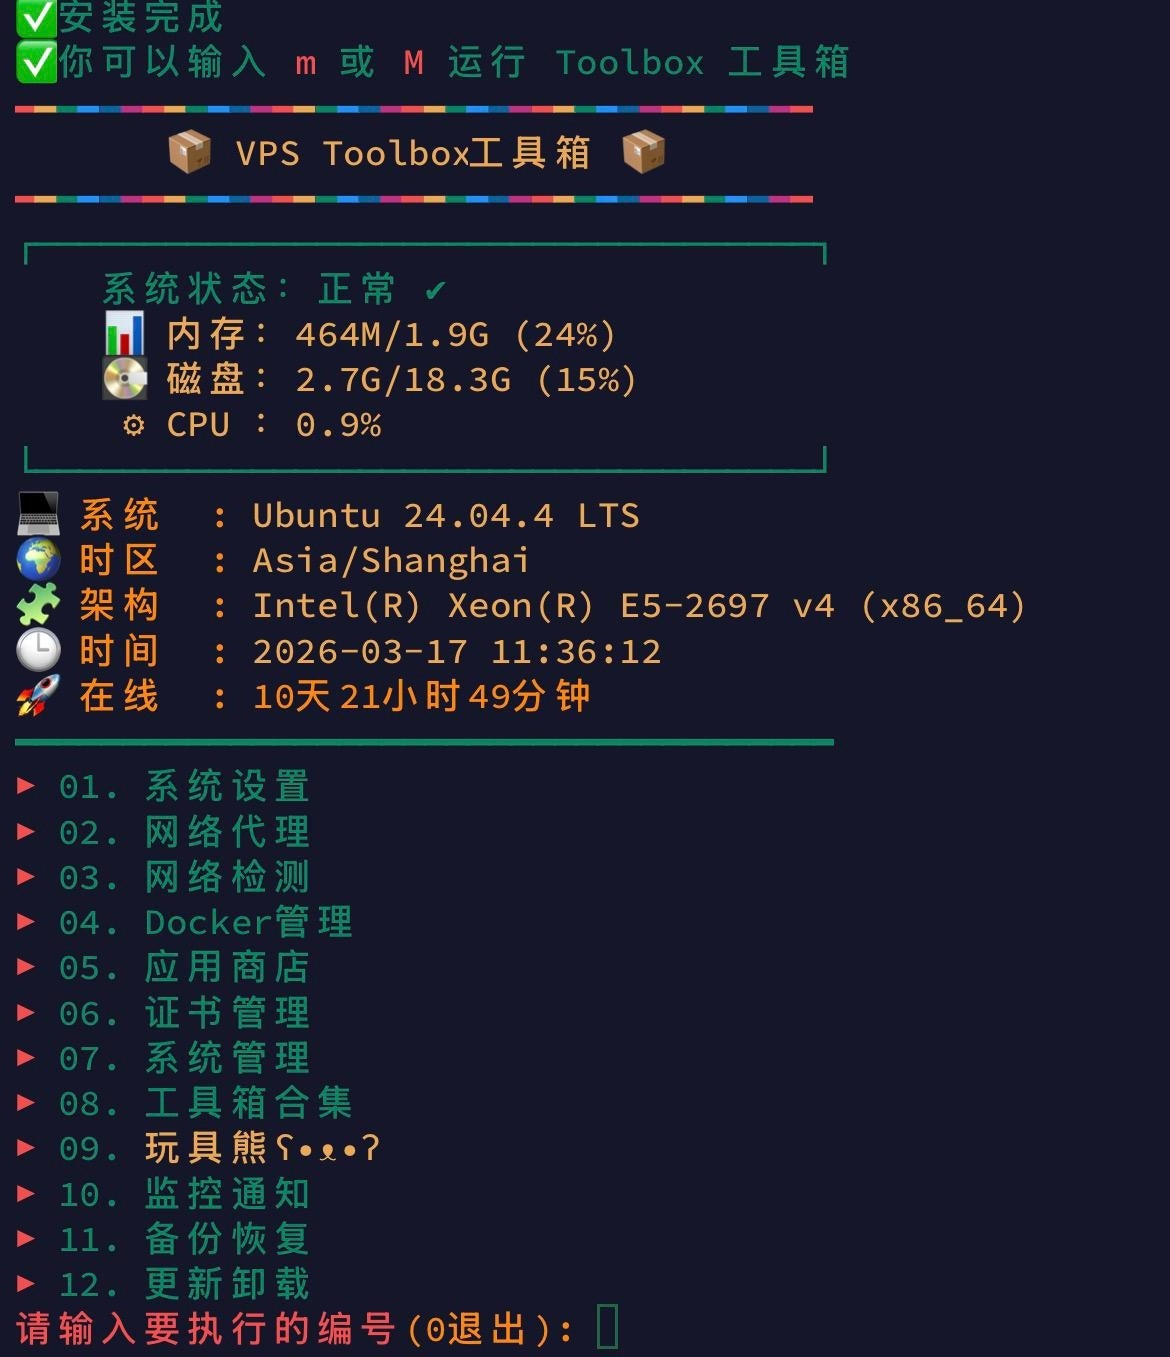
📸 功能一览:所见即所得
交互式主菜单
工具箱采用了极简的中文交互界面,逻辑清晰,即便是第一次接触 Linux 的小白也能快速上手。
⚡ 快速部署:两行命令搞定
在使用工具箱之前,请确保你的系统已安装 curl。
1️⃣ 环境准备(以 Debian/Ubuntu 为例)
1 | apt-get update -y && apt-get install -y curl |
2️⃣ 一键开启工具箱
复制并运行以下指令,脚本会自动完成初始化:
1 | bash <(curl -fsSL tool.wwwo.eu.cc) |
🧭 核心快捷键:记往这一个就够了
安装完成后,你不再需要输入长长的路径。在任何目录下,只需输入:
m(小写) 或M(大写)
即可瞬间唤醒工具箱。这种“快捷指令”的设计,极大地提升了在 SSH 窗口中的操作流畅度。
🧩 深度解析:它能为你做什么?
VPS Toolbox 的强大之处在于它的全栈覆盖能力:
🛠 系统层优化
- Swap 管理:内存不够?一键创建虚拟内存。
- BBR 加速:优化网络传输协议,显著提升访问速度。
- 时区对齐:解决日志时间偏差问题的必备操作。
🐳 Docker 生态管理
- 一键环境:自动安装 Docker 及 Docker Compose。
- 容器透视:图形化展示运行状态,支持快速停止/删除。
🌐 网络与安全
- 全能测速:集成 Speedtest 等多节点测速。
- SSL 盾牌:通过 Acme 脚本自动申请并续签证书。
- 防火墙管理:简单几步开关端口,保障服务器安全。
🎯 最佳实践流程
- 新机入库:先用
m里的“系统优化”跑一遍基础配置。 - 环境搭建:选择“Docker 管理”一键安装容器引擎。
- 应用部署:利用内置的应用商店安装面板或工具。
- 定期维护:输入
m检查磁盘占用,清理 Docker 虚悬镜像。
⚠️ 贴心提示
- 权限要求:请务必在 root 用户下运行,否则部分修改系统配置的功能会失效。
- 数据备份:虽然工具箱很稳,但在进行系统内核修改(如安装 BBR)前,养成快照备份的好习惯准没错。
- 退出方式:在任何菜单界面,输入
0即可安全退出。
🎉 结语
VPS Toolbox 真正做到了“复杂的事情简单化”。它将零散的 GitHub 脚本整合进一个统一的入口,是你折腾 VPS 道路上不可或缺的伴侣。
你会给你的新服务器装上这个“全能助手”吗? 欢迎在评论区分享你最常用的工具箱功能!
]]>